|
||||
|
|
ФАЙЛЫ WINDOWSAppEvent.EvtМестонахождение: WINDOWS\system32\config Файл AppEvent.Evt является журналом событий приложений, используемого реестром Windows boot.iniМестонахождение: C:\ (в корневой папке системного диска) Описание:
Доступные ключи для файла boot.ini (Windows XP и Windows Server 2003) Вы можете добавлять в файл boot.ini различные ключи, которые используются при загрузке системы Windows XP или Windows Server 2003. /3GB This switch forces x86-based systems to allocate 3 GB of virtual address space to programs and 1 GB to the kernel and to executive components. A program must be designed to take advantage of the additional memory address space. With this switch, user mode programs can access 3 GB of memory instead of the usual 2 GB that Windows allocates to user mode programs. The switch moves the starting point of kernel memory to 3 GB. Some configurations of Microsoft Exchange Server 2003 and Microsoft Windows Server 2003 may require this switch. For additional information, click the following article number to view the article in the Microsoft Knowledge Base: 823440 You must use the /3GB switch when you install Exchange Server 2003 on a Windows Server 2003-based system For additional information, click the following article number to view the article in the Microsoft Knowledge Base: 171793 Information on application use of 4GT RAM tuning /basevideo Ключ /basevideo позволяет загружаться с использованием основного стандартного драйвера VGA (640x480, 16 цветов). Этот режим полезен, если причиной неправильной загрузки Windows является новый драйвер для видеоадаптера. Основной драйвер видеоадаптера всегда используется при загрузке в безопасном режиме («Безопасный режим», «Безопасный режим с загрузкой сетевых драйверов» или «Безопасный режим с поддержкой командной строки»). Причиной сбое может быть неправильное разрешение экрана и частота развертки. Можно для удобства также использовать в связке ключ /sos. /baudrate=number This switch sets the baud rate of the debug port that is used for kernel debugging. For example, type /baudrate=9600. The default baud rate is 9600 kilobits per second (Kbps) if a modem is attached. The default baud rate is 115,200 Kbps for a null-modem cable. 9,600 is the normal rate for remote debugging over a modem. If this switch is in the Boot.ini file, the /debug switch is automatically enabled. For additional information about modem configuration, click the following article number to view the article in the Microsoft Knowledge Base: 148954 How to set up a remote debug session using a modem For additional information about null modem configuration, click the following article number to view the article in the Microsoft Knowledge Base: 151981 How to set up a remote debug session using a null modem cable /bootlog При использовании данного параметра система записывает в файл Windows\Ntbtlog.txt перечень всех драйверов и служб, которые были загружены (или не загружены). При загрузке компьютера в безопасном режиме, в безопасном режиме с загрузкой сетевых драйверов и в безопасном режиме с поддержкой командной строки в журнал загрузки добавляется список всех загружаемых драйверов и служб. Журнал загрузки полезен для определения точной причины неполадок при загрузке системы. /bootlogo Используется собственный экран загрузки в Windows XP или Windows Server 2003, вместо стандартного экрана с бегающей полоской индикатора. Предварительно следует создать 16-цветную растровую картинку размером 640x480 пикселов и сохранить ее в папке Windows под именем Boot.bmp. Затем добавить в boot.ini ключи "/bootlogo /noguiboot". /break Causes the hardware abstraction layer (HAL) to stop at a breakpoint at HAL initialization. The first thing the Windows kernel does when it initializes is to initialize the HAL, so this breakpoint is the earliest one possible. The HAL will wait indefinitely at the breakpoint until a kernel-debugger connection is made. If the switch is used without the /DEBUG switch, the system will Blue Screen with a STOP code of 0x00000078 (PHASE0_ EXCEPTION). /burnmemory=number This switch specifies the amount of memory, in megabytes, that Windows cannot use. Use this parameter to confirm a performance problem or other problems that are related to RAM depletion. For example, type /burnmemory=128 to reduce the physical memory that is available to Windows by 128 MB. /CHANNEL= Used on conjunction with /DEBUGPORT=1394 to specify the IEEE 1394 channel through which kernel debugging communications will flow. This can be any number between 0 and 62 and defaults to 0 if not set. Use this switch together with the /debug switch and the /debugport switch to configure Windows to send debug information over an Institute of Electrical and Electronics Engineers, Inc. (IEEE) 1394 port. To support debugging over a 1394 port, both computers must be running Microsoft Windows XP or later. The 1394 port has a maximum number of 63 independent communications channels that are numbered 0 through 62. Different hardware implementations support a different number of channels across one bus. Windows XP has a limit of four destination computers. However, this limitation is removed in Windows Server 2003. To perform debugging, select a common channel number to use on both the computer that the debugger runs on, which is also known as the host computer, and the computer that you want to debug, which is also known as the destination computer. You can use any number from 1 to 62. To configure the destination computer 1. Edit the Boot.ini file to add the /CHANNEL=x option to the operating system entry that you have configured for debugging. Replace x with the channel number that you want to use. For example, configure the [operating systems] area of the Boot.ini file to look similar to the following:
2. Plug the 1394 cable in one of the 1394 ports. 3. Disable the 1394 host controller on the destination computer. To do this, start Device Manager, right-click the device, and then click Disable. 4. Restart the computer. To configure the host computer 1. Plug the 1394 cable in one of the 1394 ports. 2. Install the kernel debugger binary files. 3. Start a command prompt. Press enter after you type each of the following commands:
4. Move to the folder where you installed the kernel debugger, and then type the following command: kd.exe When you first start the debugger, a 1394 virtual driver is installed. This driver permits the debugger to communicate with the destination computer. You must be logged on with administrator rights for this driver installation to complete successfully. /CLKLVL Causes the standard x86 multiprocessor HAL (Halmps.dll) to configure itself for a level-sensitive system clock rather then an edge-triggered clock. Level-sensitive and edge-triggered are terms used to describe hardware interrupt types. /CMDCONS Passed when booting with into the Recovery Console (described later in this chapter). /crashdebug This switch loads the kernel debugger when you start the operating system. The switch remains inactive until a Stop message error occurs. /crashdebug is useful if you experience random kernel errors. With this switch, you can use the COM port for normal operations while Windows is running. If Windows crashes, the switch converts the port to a debug port. (This action turns on remote debugging.) For additional information, click the following article number to view the article in the Microsoft Knowledge Base: 151981 How to set up a remote debug session using a null modem cable /debug This switch turns on the kernel debugger when you start Windows. The switch can be activated at any time by a host debugger that is connected to the computer, if you want to turn on live remote debugging of a Windows system through the COM ports. Unlike the /crashdebug switch, /debug uses the COM port whether you are debugging or not. Use this switch when you are debugging problems that are regularly reproducible. For additional information about remote debugging, click the following article number to view the article in the Microsoft Knowledge Base: 121543 Setting up for remote debugging /debugport=comnumber This switch specifies the communications port to use for the debug port, where number is the communications port, such as COM1, that you want to use. By default, /debugport uses COM2 if it exists. Otherwise, the switch uses COM1. If you include this switch in the Boot.ini file, the /debug switch becomes active. For additional information, click the following article number to view the article in the Microsoft Knowledge Base: 151981 How to set up a remote debug session using a null modem cable /EXECUTE This option disables no-execute protection. See the /NOEXECUTE switch for more information. /fastdetect:comnumber This switch turns off serial and bus mouse detection in the Ntdetect.com file for the specified port. Use this switch if you have a component other than a mouse that is attached to a serial port during the startup process. For example, type /fastdetect:comnumber, where number is the number of the serial port. Ports may be separated with commas to turn off more than one port. If you use /fastdetect, and you do not specify a communications port, serial mouse detection is turned off on all communications ports. Note In earlier versions of Windows, including Windows NT 4.0, this switch was named /noserialmice. For additional information, click the following article number to view the article in the Microsoft Knowledge Base: 131976 How to disable detection of devices on serial ports The reason the qualifier exists (vs. just having NTDETECT perform this operation by default) is so that NTDETECT can support booting Windows NT 4. Windows Plug and Play device drivers perform detection of parallel and serial devices, but Windows NT 4 expects NTDETECT to perform the detection. Thus, specifying /FASTDETECT causes NTDETECT to skip parallel and serial device enumeration (actions that are not required when booting Windows), whereas omitting the switch causes NTDETECT to perform this enumeration (which is required for booting Windows NT 4). /HAL=filename With this switch, you can define the actual hardware abstraction layer (HAL) that is loaded at startup. For example, type /HAL=halmps.dll to load the Halmps.dll in the System32 folder. This switch is useful to try out a different HAL before you rename the file to Hal.dll. This switch is also useful when you want to try to switch between starting in multiprocessor mode and starting in single processor mode. To do this, use this switch with the /kernel switch. /INTAFFINITY Directs the standard x86 multiprocessor HAL (Halmps.dll) to set interrupt affinities such that only the highest numbered processor will receive interrupts. Without the switch, the HAL defaults to its normal behavior of letting all processors receive interrupts. /kernel=filename With this switch, you can define the actual kernel that is loaded at startup. For example, type /kernel=ntkrnlmp.exe to load the Ntkrnlmp.exe file in the System32 folder. With this switch, you can switch between a debug-enabled kernel that is full of debugging code and a regular kernel. Enable you to override Ntldr's default filename for the kernel image (Ntoskrnl.exe) and/or the HAL (Hal.dll). These options are useful for alternating between a checked kernel environment and a free (retail) kernel environment or even to manually select a different HAL. If you want to boot a checked environment that consists solely of the checked kernel and HAL, which is typically all that is needed to test drivers, follow these steps on a system installed with the free build: • Copy the checked versions of the kernel images from the checked build CD to your \Windows\System32 directory, giving the images different names than the default. For example, if you're on a uniprocessor, copy Ntoskrnl.exe to Ntoschk.exe and Ntkrnlpa.exe to Ntoschkpa.exe. If you're on a multiprocessor, copy Ntkrnlmp.exe to Ntoschk.exe and Ntkrpamp.exe to Ntoschkpa.exe. The kernel filename must be an 8.3-style short name. • Copy the checked version of the appropriate HAL needed for your system from \I386\Driver.cab on the checked build CD to your \Windows\System32 directory, naming it Halchk.dll. To determine which HAL to copy, open \Windows\Repair\Setup.log and search for Hal.dll; you'll find a line like \WINDOWS\system32\ hal.dll="halacpi.dll","1d8a1". The name immediately to the right of the equals sign is the name of the HAL you should copy. The HAL filename must be an 8.3-style short name. • Make a copy of the default line in the system's Boot.ini file. • In the string description of the boot selection, add something that indicates that the new selection will be for a checked build environment (for example, “Windows XP Professional Checked”). • Add the following to the end of the new selection's line: /KERNEL=NTOSCHK.EXE /HAL= HALCHK.DLL Now when the selection menu appears during the boot process you can select the new entry to boot a checked environment or select the entry you were using to boot the free build. /LASTKNOWNGOOD Causes the system to boot as if the LastKnownGood boot option was selected. /maxmem=number This switch specifies the maximum amount of RAM that Windows can use. Do not make this setting less than 12. Use this parameter to confirm whether a memory chip is faulty. For example, if you have a 128-megabyte (MB) system that is equipped with two 64-MB RAM modules, and you are experiencing memory-related Stop messages, you can type /maxmem=64. If the computer starts Windows and operates without problems, replace the first module to see if this action resolves the problem. For additional information, click the following article number to view the article in the Microsoft Knowledge Base: 108393 MAXMEM option in Windows NT Boot.ini file /MAXPROCSPERCLUSTER= For the standard x86 multiprocessor HAL (Halmps.dll), forces cluster-mode Advanced Programmable Interrupt Controller (APIC) addressing (not supported on systems with an 82489DX external APIC interrupt controller). /MININT This option is used by Windows PE (Preinstallation Environment) and causes the Configuration Manager to load the Registry SYSTEM hive as a volatile hive such that changes made to it in memory are not saved back to the hive image. /NODEBUG Prevents kernel-mode debugging from being initialized. Overrides the specification of any of the three debug-related switches, /DEBUG, /DEBUGPORT, and /BAUDRATE. /NOEXECUTE This option is only available on 32-bit versions of Windows when running on processors supporting no-execute protection. It enables no-execute protection (also known as Data Execution Protection - DEP), which results in the Memory Manager marking pages containing data as no-execute so that they cannot be executed as code. This can be useful for preventing malicious code from exploiting buffer overflow bugs with unexpected program input in order to execute arbitrary code. No-execute protection is always enabled on 64-bit versions of Windows on processors that support no-execute protection. There are several options you can specify with this switch: /NOEXECUTE=OPTIN Enables DEP for core system images and those specified in the DEP configuration dialog. /NOEXECUTE=OPTOUT Enables DEP for all images except those specified in the DEP configuration dialog. /NOEXECUTE=ALWAYSON Enables DEP on all images. /NOEXECUTE=ALWAYSOFF Disables DEP. /noguiboot Данный ключ позволяет отключить загрузочный экран, в котором вы обычно видите логотип Windows XP и индикатор прогресса. /nodebug This switch turns off debugging. This scenario can cause a Stop error if a program has a debug hardcoded breakpoint in its software. /NOLOWMEM Requires that the /PAE switch be present and that the system have more than 4 GB of physical memory. If these conditions are met, the PAE-enabled version of the Windows kernel, Ntkrnlpa.exe, won't use the first 4 GB of physical memory. Instead, it will load all applications and device drivers, and allocate all memory pools, from above that boundary. This switch is useful only to test device driver compatibility with large memory systems. /NOPAE Forces Ntldr to load the non-Physical Address Extension (PAE) version of the Windows kernel, even if the system is detected as supporting x86 PAEs and has more than 4 GB of physical memory. /NOSERIALMICE=[COMx | COMx,y,z...] Obsolete Windows NT 4 qualifier—replaced by the absence of the /FASTDETECT switch. Disables serial mouse detection of the specified COM ports. This switch was used if you had a device other than a mouse attached to a serial port during the startup sequence. Using /NOSERIALMICE without specifying a COM port disables serial mouse detection on all COM ports. See Microsoft Knowledge Base article Q131976 for more information. /numproc=number This switch sets the number of processors that Windows will run at startup. With this switch, you can force a multiprocessor system to use only the quantity of processors (number) that you specify. This switch can help you troubleshoot performance problems and defective CPUs. /ONECPU Causes Windows to use only one CPU on a multiprocessor system. /PAE Causes Ntldr to load Ntkrnlpa.exe, which is the version of the x86 kernel that is able to take advantage of x86 PAEs. The PAE version of the kernel presents 64-bit physical addresses to device drivers, so this switch is helpful for testing device driver support for large memory systems. Use the /PAE switch with the corresponding entry in Boot.ini to permit a computer that supports physical address extension (PAE) mode to start normally. In Safe Mode, the computer starts by using normal kernels, even if the /PAE switch is specified. /pcilock For x86-based systems, this switch stops the operating system from dynamically assigning hardware input, hardware output, and interrupt request resources to Peripheral Connect Interface (PCI) devices. With this switch, the BIOS configures the devices. /RDPATH= Specifies the path to a System Disk Image (SDI) file, which can be on the network, that the system will use to boot from. Often used in conjunction with the /RDIMAGEOFFSET= flag to indicate to NTLDR where in the file the system image starts. /REDIRECT Introduced with Windows XP. Used to cause Windows to enable Emergency Management Services (EMS) that reports boot information and accepts system management commands through a serial port. Specify serial port and baudrate used in conjunction with EMS with redirect= and redirectbaudrate= lines in the [boot loader] section of the Boot.ini file. Use this switch to turn on Emergency Management Services (EMS) on a Windows Server 2003, Enterprise Edition-based computer. For additional information about EMS, search on "Emergency Management Services" in Windows Help and Support. To turn on EMS by editing the Boot.ini on an x86-based computer, edit both the [boot loader] section and the [operating systems] section of the Boot.ini file. To do this, configure the following entries: - Under [boot loader], add one of the following required statements: redirect=COMx In this statement, replace x with one of the following COM port numbers: 1 2 3 4 redirect=USEBIOSSETTINGS This statement permits the computer BIOS to determine the COM port to use for EMS. - Under [boot loader], add the following option statement:redirectbaudrate=baudrateReplace baudrate with one of the following values: 9600 19200 57600 115200 By default, EMS uses the 9600 Kbps baud rate setting. - Under [operating systems], add the /redirect option to the operating system entry that you want to configure to use EMS. The following example illustrates the use of these switches:
/safeboot:parameter This switch causes Windows to start in Safe Mode. This switch uses the following parameters: - minimal - network - safeboot:minimal(alternateshell) You can combine other Boot.ini parameters with /safeboot:parameter. The following examples illustrate the parameters that are in effect when you select a Safe Mode option from the startup recovery menu. Safe Mode with Networking /safeboot:minimal /sos /bootlog /noguiboot Safe Mode with Networking /safeboot:network /sos /bootlog /noguiboot Safe Mode with Command Prompt /safeboot:minimal(alternateshell) /sos /bootlog /noguiboot Note The /sos, /bootlog, and /noguiboot switches are not required with any one of these settings, but the switches can help with troubleshooting. These switches are included if you press F8 and then select one of the modes. Specifies options for a safe boot. You should never have to specify this option manually, since Ntldr specifies it for you when you use the F8 menu to perform a safe boot. (A safe boot is a boot in which Windows only loads drivers and services that are specified by name or group under the Minimal or Network registry keys under HKLM\SYSTEM\CurrentControlSet\Control\SafeBoot.) Following the colon in the option you must specify one of three additional switches: MINIMAL, NETWORK, or DSREPAIR. The MINIMAL and NETWORK flags correspond to safe boot with no network and safe boot with network support, respectively. The DSREPAIR (Directory Services Repair) switch causes Windows to boot into a mode in which it restores the Active Directory directory service from a backup medium you present. An additional option you can append is (ALTERNATESHELL), which tells Windows to use the program specified by the HKLM\SYSTEM\CurrentControlSet\ SafeBoot\AlternateShell value as the graphical shell rather than to use the default, which is Windows Explorer. /SCSIORDINAL: Directs Windows to the SCSI ID of the controller. (Adding a new SCSI device to a system with an on-board SCSI controller can cause the controller's SCSI ID to change.) See Microsoft Knowledge Base article Q103625 for more information. /SDIBOOT= Used in Windows XP Embedded systems to have Windows boot from a RAM disk image stored in the specified System Disk Image (SDI) file. /sos The /sos switch displays the device driver names while they are being loaded. By default, the Windows Loader screen only echoes progress dots. Use this switch with the /basevideo switch to determine the driver that is triggering a failure. For additional information, click the following article number to view the article in the Microsoft Knowledge Base: 99743 Purpose of the Boot.ini file in Windows 2000 or Windows NT /userva Use this switch to customize the amount of memory that is allocated to processes when you use the /3GB switch. This switch permits more page table entry (PTE) kernel memory but still maintains almost 3 GB of process memory space. For additional information about how to use the /USERVA switch, click the following article number to view the article in the Microsoft Knowledge Base: 316739 How to use the /USERVA switch in the Boot.ini file to tune /3GB configurations For additional information, click the following article numbers to view the articles in the Microsoft Knowledge Base: 810371 XADM: Using the /userva switch on Windows Server 2003-based Exchange Servers 323427 HOW TO: Manually edit the Boot.ini file in a Windows Server 2003 environment 317526 HOW TO: Edit the Boot.ini file in Windows Server 2003 317521 Description of the Bootcfg command and its uses 289022 HOW TO: Edit the Boot.ini file in Windows XP 291980 A discussion about the Bootcfg command and its uses /WIN95 Directs Ntldr to boot the Consumer Windows boot sector stored in Bootsect.w40. This switch is pertinent only on a triple-boot system that has MS-DOS, Consumer Windows, and Windows installed. See Microsoft Knowledge Base article Q157992 for more information. /WIN95DOS Directs Ntldr to boot the MS-DOS boot sector stored in Bootsect.dos. This switch is pertinent only on a triple-boot system that has MS-DOS, Consumer Windows, and Windows installed. See Microsoft Knowledge Base article Q157992 for more information. /YEAR= Instructs the Windows core time function to ignore the year that the computer's real-time clock reports and instead use the one indicated. Thus, the year used in the switch affects every piece of software on the system, including the Windows kernel. Example: /YEAR=2001. (This switch was created to assist in Y2K testing.) filelist.xml Местонахождение: WINDOWS\system32\Restore Скрытый файл filelist.xml содержит список файлов и настроек, за которыми следит программа восстановления системы rstrui.exe. Вы можете просмотреть данный файл в Internet Explorer. Изучив внимательно XML-файл, можно заметить, что он дает указание программе восстановления системы следить за файлами определенных расширений, заданными папками и ветвями реестра hostsМестонахождение: WINDOWS\system32\drivers\etc Специальный файл hosts (обратите внимание, что файл без расширения) предназначен для сопоставления IP-адресов и имен серверов. Наиболее распространенное использование - Блокировка рекламных сайтов (подробнее в справочнике Народные советы) lusrmgr.mscМестонахождение: Windows\system32 Локальные пользователи и группы - Local Users and Groups Оснастка Локальные пользователи и группы — это инструмент, предназначенный для управления локальными пользователями и группами. В Windows XP Home Edition данная оснастка отсутствует. Будьте осторожны с неиспользуемыми пользовательскими учетными записями. Например, на вашем компьютере была учетная запись сотрудника фирмы. После увольнения сотрудника неиспользуемую учетную запись лучше сразу же отключить. Запустите остнастку и в появившемся окне из соответствующей папки выберите «отслужившего» пользователя. Щелкнув правой кнопкой мыши в свойствах учетной записи активируйте пункт Отключить учетную запись. Читатели могут удивиться: а зачем отключать, если можно удалить? Можно и удалить, но при удалении учетной записи безвозвратно теряется ее идентификатор безопасности SID (даже если вы потом снова создадите новую запись с тем же именем и паролем, идентификатор все равно будет уже другим). А с потерей SID вы потеряете доступ ко всем закодированным файлам и паролям, которые использовал прежний пользователь. Обладатели XP Home Edition оснастка могут воспользоваться утилитой net для отключения пользователя. net user имя_пользователя /active :no mydocs.dllМестонахождение: Windows\system32 Описание: Пользовательский интерфейс папки "Мои документы" Windows XP сама создает свои подпапки в папке Мои документы (My Pictures, My Video и др.). При удалении этих папок они создаются заново! Если вам не нравится подобное поведение, то надо лишь выполнить команду regsvr32 /u mydocs.dll и подпапки создаваться не будут. А если захотите вернуть все обратно, то введите в командной строке следующее: regsvr32 mydocs.dll ntshrui.dllМестонахождение: Windows\system32 Описание: Расширения оболочки, обеспечивающие доступ к ресурсам - Shell extensions for sharing Файл, в котором содержатся различные данные, необходимые для работы с ресурсами. В частности в этом файле содержится изображение ладошки, используемое в значках расшаренных ресурсов. Чтобы удалить эту ладошку, можно воспользоваться правкой реестра (смотри Справочник по реестру Windows) ntuser.datМестонахождение: C:\Documents and Settings\ИмяПользователя Файл ntuser.dat является кустом реестра Windows HKEY_USERS/SID oeminfo.iniМестонахождение: Windows\system32 Описание: Если создать текстовый файл oeminfo.ini и поместить его в системную папку Windows (как правило Windows\system32), то в апплете Система Панели управления, появится кнопка Сведения о поддержке 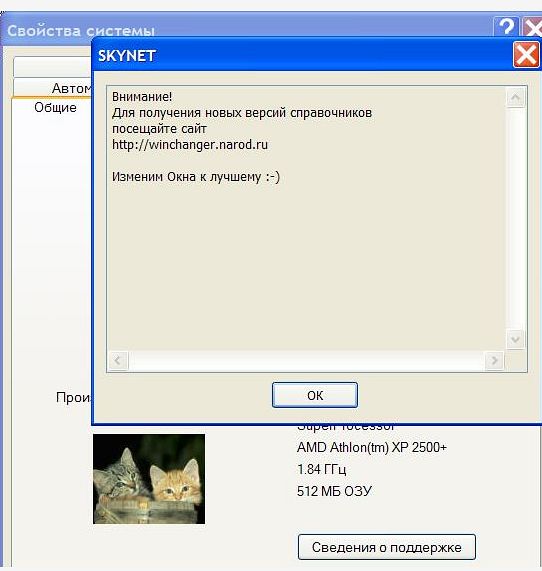 Файл oeminfo.ini имеет следующую структуру:
Строго говоря, данный файл не присутствует на чистом инсталяционном диске Windows, но может входить в Windows, который предустановлен на компьютерах различных производителей, имеющих соответствующую лицензию. oemlogo.bmpМестонахождение: Windows\system32 Описание: Чтобы добавить собственную картинку в апплет Система Панели управления, надо создать или модифицировать картинку, которая находится в файле oemlogo.bmp и поместить файл в системную папку Windows (как правило Windows\system32) 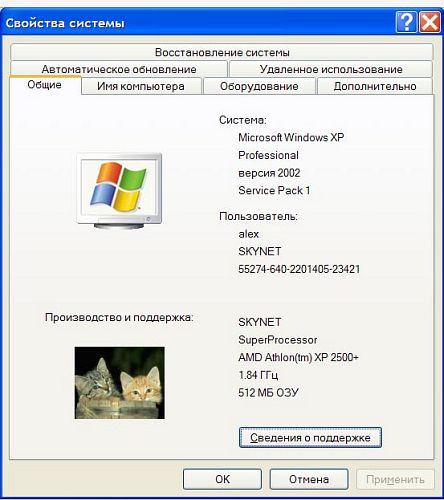 Файл oemlogo.bmp создается в любом графическом редакторе (напр. Paint) с размером 172 на 100 пикселов (русская версия Windows XP). Надо сказать, что размеры картинки в разных версиях Windows постоянно менялись. Как правило, слишком большая картинка просто обрезается. Также необходимо иметь в этой же папке файл oeminfo.ini, иначе картинка не будет выводиться вообще. Строго говоря, данный файл не присутствует на чистом инсталяционном диске Windows, но может входить в Windows, который предустановлен на компьютерах различных производителей, имеющих соответствующую лицензию. pfirewall.logМестонахождение: WINDOWS В файл pfirewall.log записывается информация, которую впоследствии можно использовать для устранения неполадок. По умолчанию, данный файл находится в папке Windows. Вы можете изменить местонахождение данного файла. Для этого выбираем Пуск Панель управления Брандмауэр Windows Допольнительно Ведение журнала безопасности кнопка Параметры. В диалоговом окне вы можете изменить имя файла и его местоположение. А также управлять размером данного файла. Если вы уберете галочки с двух верхних кнопок, то данного файла на компьютере не будет. SAMМестонахождение: WINDOWS\system32\config Файл SAM (обратите внимание, что файл без расширения) содержит раздел реестра HKLM\SAM SecEvent.EvtМестонахождение: WINDOWS\system32\config Файл SecEvent.Evt является журналом событий безопасности, используемого реестром Windows SECURITYМестонахождение: WINDOWS\system32\config Файл SECURITY (обратите внимание, что файл без расширения) содержит раздел реестра HKLM\SECURITY shmedia.dllМестонахождение: Windows\system32 Описание: Извлечение свойств медиа-файлов - Media File Property Extractor Shell Extension Эта библиотаек отвечает за сбор информации об AVI-файлах. На некоторых компьютерах при щелчке правой кнопкой по файлу с расширением AVI выскакивает окно с ошибкой "Explorer.exe Обнаружена ошибка...". В этом случае попробуйте отключить библиотеку
softwareМестонахождение: WINDOWS\system32\config Файл software (обратите внимание, что файл без расширения) содержит раздел реестра HKLM\Software srclient.dllМестонахождение: WINDOWS\system32 Описание: SR CLIENT DLL Файл srclient.dll является клиентской DLL для программы восстановления системы rstrui.exe и используется при написании скриптов Svcpack.logМестонахождение: Windows Описание: Файл Svcpack.log является протоколом хода установки сервис-пака. Исследуя лог установки, вы можете найти причины неудачной установки. Например, если вы увидите такие записи: "There is not enough space on the disk. Service Pack 2 installation did not complete", то станет ясно, что программе установки не хватает места на жестком диске. Попробуйте освободить диск от лишних файлов и повторите попытку. SysEvent.EvtМестонахождение: WINDOWS\system32\config Файл SysEvent.Evt является журналом событий системы, используемого реестром Windows systemМестонахождение: WINDOWS\system32\config Файл system (обратите внимание, что файл без расширения) содержит раздел реестра HKLM\System UsrClass.datМестонахождение C:\Documents and Settings\ИмяПользователя\Local Settings\Application Data\Microsoft\Windows Файл UsrClass.dat является кустом реестра Windows HKEY_USERS/SID_Classes WindowsUpdate.logМестонахождение: Windows Файл, содержащий историю автоматического обновления. wpa.dblМестонахождение: Windows\system32 Описание: Как известно, лицензионная Windows XP при переустановке системы требует повторной активации. Чтобы этого избежать, достаточно перед переустановкой системы скопировать файл wpa.dbl, расположенный в папке windows\System32, например, на дискету - именно в этом файле хранится код активации. После переустановки системы, естественно, нужно будет заменить файл wpa.dbl на тот, что записали на дискету. РАСШИРЕНИЯ ФАЙЛОВDBX-файлыВ файлах с расширением DBX хранятся записи программы Outlook Express. В этих файлах, называемых Банком сообщений, находятся письма, сообщения новостных групп и т.п. При желании, можно скопировать эти файлы на носитель информации для переноса данных в другой компьютер. INF-файлыВ данной статье мы рассмотрим, что представляет собой INF-файл, как с его помощью работать с другими файлами и реестром, создавать ярлыки, запускать программы и т.д. Как известно, для более-менее серьезного программного продукта обычно требуется специальная программа инсталляции, с помощью которой пользователь сможет легко установить и так же легко удалить сам продукт. Существует много инструментальных средств, позволяющих быстро создавать инсталляционные пакеты. Однако, большинство из них добавляют к исходному размеру программы 200–500 Кб. А ведь это далеко не всегда радует. Серьезный продукт не обязательно должен быть внушительных размеров. И если вы хотите сделать инсталляцию доступной в Сети, то эти 200–500 Кб могут сильно сказаться на популярности продукта. Как выйти из подобной ситуации? Здесь на помощь придут inf-файлы. Именно с помощью inf-файлов можно удалять, копировать другие файлы, добавлять информацию в реестр, в ini-файлы, создавать ярлыки, в общем, все то же, что обеспечивают громоздкие программы установки. Перейдем к изучению спецификации inf-файлов. inf-файл представляет собой текстовый файл, который, содержит условия установки программного обеспечения. Чтобы запустить inf-файл, нужно щелкнуть по нему правой кнопкой мыши и выбрать в открывшемся контекстном меню параметр Установить (Install). Но для подготовки дистрибутива можно воспользоваться IExpress, который поддерживает запуск .inf-файлов. Вооружившись этой программой, а также знанием спецификации .inf-файлов, можно создавать профессиональные инсталляционные пакеты. Основную информацию в .inf-файле содержат секции, представленные в Таблице 1 (более сложные .inf-файлы могут иметь дополнительные секции). Секция [Version] обязательно должна включать строку Signature="$Chicago$" Эта секция определяет стандартный заголовок для всех inf-файлов Microsoft Windows. Если сигнатура будет не $Chicago$, операционная система Windows не примет inf-файл как принадлежащий любому из классов устройств, признанных Windows. При написании сигнатуры вы можете использовать как верхний, так и нижний регистры букв — $Chicago$ или $CHICAGO$. Секция установки [DefaultInstall] может содержать следующие параметры: CopyFiles — копирование файлов; RenFiles — переименование файлов; DelFiles — удаление файлов; UpdateInis — изменение данных в ini-файлах; UpdateIniFields — изменение областей в .ini-файлах; AddReg — добавление информации в реестр; DelReg — удаление информации из реестра; Ini2Reg — перемещение строки или секции в ini-файлах; UpdateCfgSys — изменение файла Config.sys; UpdateAutoBat — изменение файла Autoexec.bat. Этим параметрам в качестве значения присваивается имя секции с файлами. Например:
Чуть ниже представлены цифровые обозначения специальных папок, применяемые в .inf-файлах: 10 — C:\WINDOWS; 11 — C:\WINDOWS\System; 12 — C:\WINDOWS\SYSTEM\IOSUBSYS; 13 — C:\WINDOWS\COMMAND; 17 — C:\WINDOWS\Inf; 18 — C:\WINDOWS\Hlp; 20 — C:\WINDOWS\FONTS; 21 — C:\WINDOWS\SYSTEM\VIEWERS; 22 — C:\WINDOWS\SYSTEM\VMM32; 23 — C:\WINDOWS\SYSTEM\COLOR; 30 — Корневой загрузочный диск (обычно C:\). Например, если нужно скопировать файл в папку Web, которая находится в каталоге Windows, сделайте это так:
Так же можно поступить и с другими папками, находящимися в определенных каталогах. Параметр CopyFiles содержит имя секции, где находятся имена файлов для копирования с исходного диска в папку назначения. Папка назначения определяется в секции [DestinationDirs] inf-файла. В следующем примере копируются два файла:
Цифры через три запятые обозначают дополнительные флаги при копировании файлов и могут принимать значения, представленные в Параметр CopyFiles может копировать файл непосредственно из строки. Для этого перед именем файла нужно поставить символ @. В следующем примере копируются два текстовых файла:
Параметр RenFiles содержит секции, которые в свою очередь содержат имена файлов для переименования. Папка, где будет происходить переименование, должна быть определена в секции [DestinationDirs] inf-файла. В следующий примере происходит переименование двух файлов из .bmp в .txt:
В параметре AddReg указываются секции, которые содержат информацию о добавлении или изменении ключей, значений в реестре. Следующий пример регистрирует вашу копию операционной системы Windows.
С помощью этого файла в реестр добавляется следующая информация:
Обратите внимание на запятые в inf-файле. Если нужно добавить в реестр параметр по умолчанию, запятые должны быть проставлены иначе. Например, в рассмотренном нами ключе реестра HKEY_LOCAL_MACHINE\SOFTWARE\Microsoft\Windows\CurrentVersion сделаем параметр по умолчанию равным единице (1):
Ниже представлены корневые имена реестра, применяемые в inf-файлах. HKCR — HKEY_CLASSES_ROOT; HKCU — HKEY_CURRENT_USER; HKLM — HKEY_LOCAL_MACHINE; HKU — HKEY_USERS; HKR — относительный ключ, используется классом installer; обычно применяется для дисков устройства. В параметре DelReg указываются секции, которые содержат информацию об удалении подключей с параметрами и значениями из реестра. Следующий пример демонстрирует удаление подключа Graphviz со всеми параметрами и значениями этого раздела реестра — HKEY_CURRENT_USER\Software\AT&T\Graphviz:
Корневые имена реестра, естественно, обозначаются так же, как и при добавлении информации в реестр. В процессе установки можно прервать выполнение .inf-файла для показа пользователю какого-нибудь документа (после закрытия которого установка продолжится) или запустить определенный процесс. Следующий пример отображает файл справки About.hlp и текстовый файл About.txt, после чего запускает другой inf-файл — Example.inf:
После того как определенные в секции [ExampleView] команды выполнятся, записи, добавленные в реестр, будут автоматически удалены из него. Таким образом можно запускать и другие процессы, например апплеты Панели управления:
В следующем примере показано, как с помощью inf-файла изменить содержимое ini-файла:
С помощью inf-файлов можно также создавать/удалять ярлыки в меню Пуск. Ярлык можно создать в уже созданной группе программ. Если таковой не существует, она будет создана автоматически. Следующий пример создает группу программ Windows + + в меню Пуск > Программы и ярлыки к утилитам winipcfg.exe (Конфигурация IP), Regedit.exe (Редактор реестра) и Winfile.exe (Диспетчер файлов — только в Win98). Все они есть у вас на компьютере и лежат в папке Windows.
Ярлык прописывается в таком порядке: 1. Название группы программ. В нашем случае — Windows + +. 2. Имя ярлыка. 3. Путь к программе, к которой создается ярлык. 4. Рабочий каталог, обычно тот же, что и путь. Некоторые программы не работают, если это условие не выполняется. 5. Имя программы с расширением. Параметр %30%\ определяет корневой диск. Если вы хотите создать ярлык к файлу, который находиться в каталоге Program Files, смело прописывайте полный путь (не используйте короткие имена), например %30%\Program Files\Setup Generator Pro\Sgpro.exe. Для удаления ярлыка нужно убрать все записи, указанные после имени ярлыка. В следующем примере удаляется ярлык Конфигурация IP из программной группы Windows + +.
Если вы удаляете один из ярлыков программной группы, то удаление не затронет другие ярлыки. Для полного удаления программной группы нужно прописать данное действие для каждого ярлыка. К сожалению, вы не сможете с помощью inf-файла обычным способом скопировать файлы с длинными именами. Поддержка длинных файловых имен в .inf-файлах немного усложнена, но главное, что она существует. Для этого нужно проделать следующее: исходный файл должен быть с коротким именем, после установки его имя нужно сделать подлиннее. Для удаления процесс повторяется в обратном порядке: длинное файловое имя делается коротким и удаляется уже файл с 8.3-именем. Происходит все это с помощью реестра. Для этих действий в реестре предусмотрены специальные ключи:
Для действий переименования или удаления нужно добавить подключ с любым именем в соответствующую ветвь реестра. Минимум два ключа должны быть определены. Первый ключ содержит имя каталога, где будет происходить переименование или удаление файлов. Следующий ключ содержит имена файлов: первое — короткое, второе — длинное и его атрибуты, если нужно: 1 — Только для чтения; 2 — Скрытый; 3 — Системный. Следующий пример демонстрирует переименование в каталоге C:\Files файла About.txt в About View files.txt и установление ему атрибута «Скрытый», а также переименование того же файла в подкаталоге Xmp папки C:\Files с установлением ему атрибута «Только для чтения»:
Ключи для удаления файлов имеют такую же структуру. Рассмотрим пример, который в каталоге C:\Files удаляет файл About View files.txt и такой же файл удаляет в подкаталоге Xmp папки C:\Files:
Параметры Example и SubDir могут быть любыми, например названием вашей программы, подкаталога и т.д. Важно, чтобы они были разными, т.к. переименование/удаление происходит в разных каталогах. Данная статья не претендует на полноту, но надеюсь, поможет читателю освоить inf-файлы хотя бы поверхностно. Не бойтесь экспериментировать, но будьте предельно осторожны, особенно с процессами удаления. HTML-приложенияНачиная с Internet Explorer 5.0 появилась возможность создавать HTML-приложения с любым пользовательским интерфейсом при помощи JavaScript или VBScript. Причем, созданное html-приложение будет запускаться вне браузера и ничем не будет отличаться от стандартных Windows-приложений. Созданное приложение будет присутствовать на панели задач, иметь свое собственное окно, меню и значок. Плюс ко всему отпадает необходимость подтверждать использование ActiveX-компонентов (система защиты Internet Explorer предусматривает появление предупреждающих сообщений при попытке использования ActiveX в HTML-документах). Вы имеете полный контроль над системой, включая чтение/запись файлов, данных в реестре, управление процессами. Для создания такого приложения достаточно обычного Блокнота (или другой текстовый редактор). Данные html-приложения должны иметь расширение *.hta. Простейший случай будет выглядеть так:
Создайте подобный файл и запустите его. Как видите, появившееся окно ничем не напоминает браузер, однако вы можете использовать такую возможность, например, как Refresh документа (в нашем случае это главное окно будущего приложения) или изменение кодировки на лету. Для удаления полосы прокрутки мы воспользовались параметром SCROLL=no в тэге BODY, можно также воспользоваться специальными свойствами тэга HTA. HTA-файлы обрабатывается программой mshta.exe, задача которой - обеспечить связь вашей программы с браузером. Для того чтобы полностью использовать новые возможности, необходимо включить тэг HTA:APPLICATION между тэгами HEAD. Как видно из приведенного примера, в тэге HTA:APPLICATION мы определяем специфические для HTA параметры. Рассмотрим их подробнее. - ID - идентификатор, который позволяет обращаться к нему как к объекту в скриптах Например: alert(MyFirstHTA.applicationName); - APPLICATIONNAME - возвращает имя вашего приложения. Должно быть уникальным. - BORDER - позволяет задать тип окантовки окна. Доступны следующие значения: thick — толстая рамка, позволяющая изменять размер окна; dialog — обычная рамка без возможности изменять размер; none — рамка отсутствует; thin — тонкая без возможности изменять размер; Дополнительно указывается стиль рамки при помощи атрибута BORDERSTYLE, который может иметь следующие значения: normal — обычная; raised — приподнятая (3D); complex — комбинация стилей raised и sunken; static — может использоваться для окон, в которых не предусмотрен пользовательский ввод, - к примеру, для создания «флэш»-окон; sunken — вдавленная (3D). - CAPTION - определяет, будет ли окно отображаться с заголовком. Может принимать значения yes или no. - ICON - путь к файлу, содержащему значок (*.ico), содержащий картинку 32х32 пикселя. Можно использовать в качестве иконки и обычный bmp-файл - главное, чтобы соблюдались размеры картинки. - SHOWINTASKBAR - если это свойство имеет значение yes, окно будет сворачиваться в панель задач, а также отображаться на Панели задач - SINGLEINSTANCE - позволяет разрешить запуск только одной копии вашего приложения; для того чтобы определить, запущенно ваше приложение во второй раз или нет, это свойство использует - APPLICATIONNAME. Может принимать значения yes/no. - SYSMENU - будет ли отображаться системное меню. WINDOWSTATE - определяет, в каком виде приложение будет стартовать. Принимает следующие значения: normal — обычное окно. minimize — свернуто. maximize — на весь экран. - MAXIMIZEBUTTON и MINIMIZEBUTTON принимают значения yes/no и отвечают за отображение кнопок Maximize и Minimize соответственно в заголовке окна. Помимо атрибутов, характеризующих внешний вид программы, может быть задана версия продукта — например, так: …VERSION=”5.0”… Для управления полосой прокрутки в окне HTA есть целых два параметра: SCROLL со значениями yes/no/auto и SCROLLFLAT — yes/no. Если у вас установлен IE5.5, то вы можете воспользоваться дополнительным атрибутом NAVIGABLE, который позволяет переход по ссылке в окне HTA. Для управления текстом предусмотрен параметр SELECTION (yes/no). В дополнение ко всему перечисленному, вы можете иметь доступ к параметрам командной строки посредством свойства commandLine. Внимание, это свойство не имеет HTML-синтаксиса и может быть доступно только из скриптов! Немаловажно заметить, что все перечисленные параметры во время выполнения доступны только для чтения. Давайте приступим к написанию своего первого скриптового приложения - создадим простейший текстовый редактор.
Константы для работы с диалогами открытия и сохранения файлов: CdlOFNFileMustExist — пользователь может вводить только имя существующего файла, в противном случае возникнет предупреждение. CdlOFNHideReadOnly — прячет опцию Hide Only (открыть только для чтения).
Константы для работы с файлами: ForReading — файл открывается для чтения; ForWriting — для записи в файл.
Создаем объект для доступа к файловой системе:
И настраиваем общие свойства для диалога открытия и сохранения:
Заголовок диалога:
Фильтр, для отображения групп файлов.
Вызываем диалог открытия и в случае если пользователь осуществил выбор пытаемся прочитать файл и отобразить его.
Естественно, дополнительными тэгами все вкусности скриптовых приложений не исчерпываются. Особую ценность представляет возможность повторного использования однажды написанного кода, создание универсальных компонентов, с которыми можно работать аналогично COM-компонентам. Дополнительную информацию, а также примеры и некоторую документацию вы можете найти по следующим адресам: http://www.wshscripting.com/ — открытый исходный код и множество примеров скриптов для WSH (Windows Scripting Host). Также стоит посетить http://www.serialscripter.com/, где помимо бесплатных HTA-приложений, сопровождающихся подробными описаниями, находится неплохая подборка ссылок на ресурсы, тем или иным образом связанные со скриптовым программированием. Источник: http://www.mycomp.com.ua/ |
|
||
|
Главная | В избранное | Наш E-MAIL | Прислать материал | Нашёл ошибку | Наверх |
||||
|
|
||||